


I first started using Gatsby while working on a Notion-like style website for our Hack Club back in 2019, and I instantly fell in love with how easy and fast the plugins and interface ran.
The experience was so seamless that I decided to create my own blog based on it.
Fast forward to today, and I’m excited to share my more complex project: my personal portfolio website!
Link: olganedelcu.com
Initial Steps
When I set out to build my portfolio, I wanted to create a space that not only showcased my experience as a software engineer but also highlighted my skills and projects.
I envisioned a clean, modern design that would make it easy for visitors to navigate and learn more about my experience and projects.
Why Gatsby?
“Have no fear of perfection — you’ll never reach it.”
— Salvador Dali.
Choosing the right framework for my portfolio was crucial and I must admit I went back to contemplating Typescript and then pure React.js and while there were good options I went back to one of my favorite frameworks: Gatsby.
I wanted something that not only looked great but also performed exceptionally well.
Here’s why Gatsby won me over:
Blazing-Fast Performance: Gatsby’s static site generation means my site loads quickly, providing a seamless experience for visitors.
SEO Friendly: With built-in optimizations, Gatsby helps my portfolio rank better in search engines, making it easier for potential employers and collaborators to find me.
Rich Ecosystem: The Gatsby ecosystem is filled with plugins and tools that make adding features like image optimization and markdown support a breeze.
The Home Page
I began with the home page, focusing on presenting my experience and skills in a visually appealing way. I wanted to make a strong first impression, so I included:
A Brief Introduction:
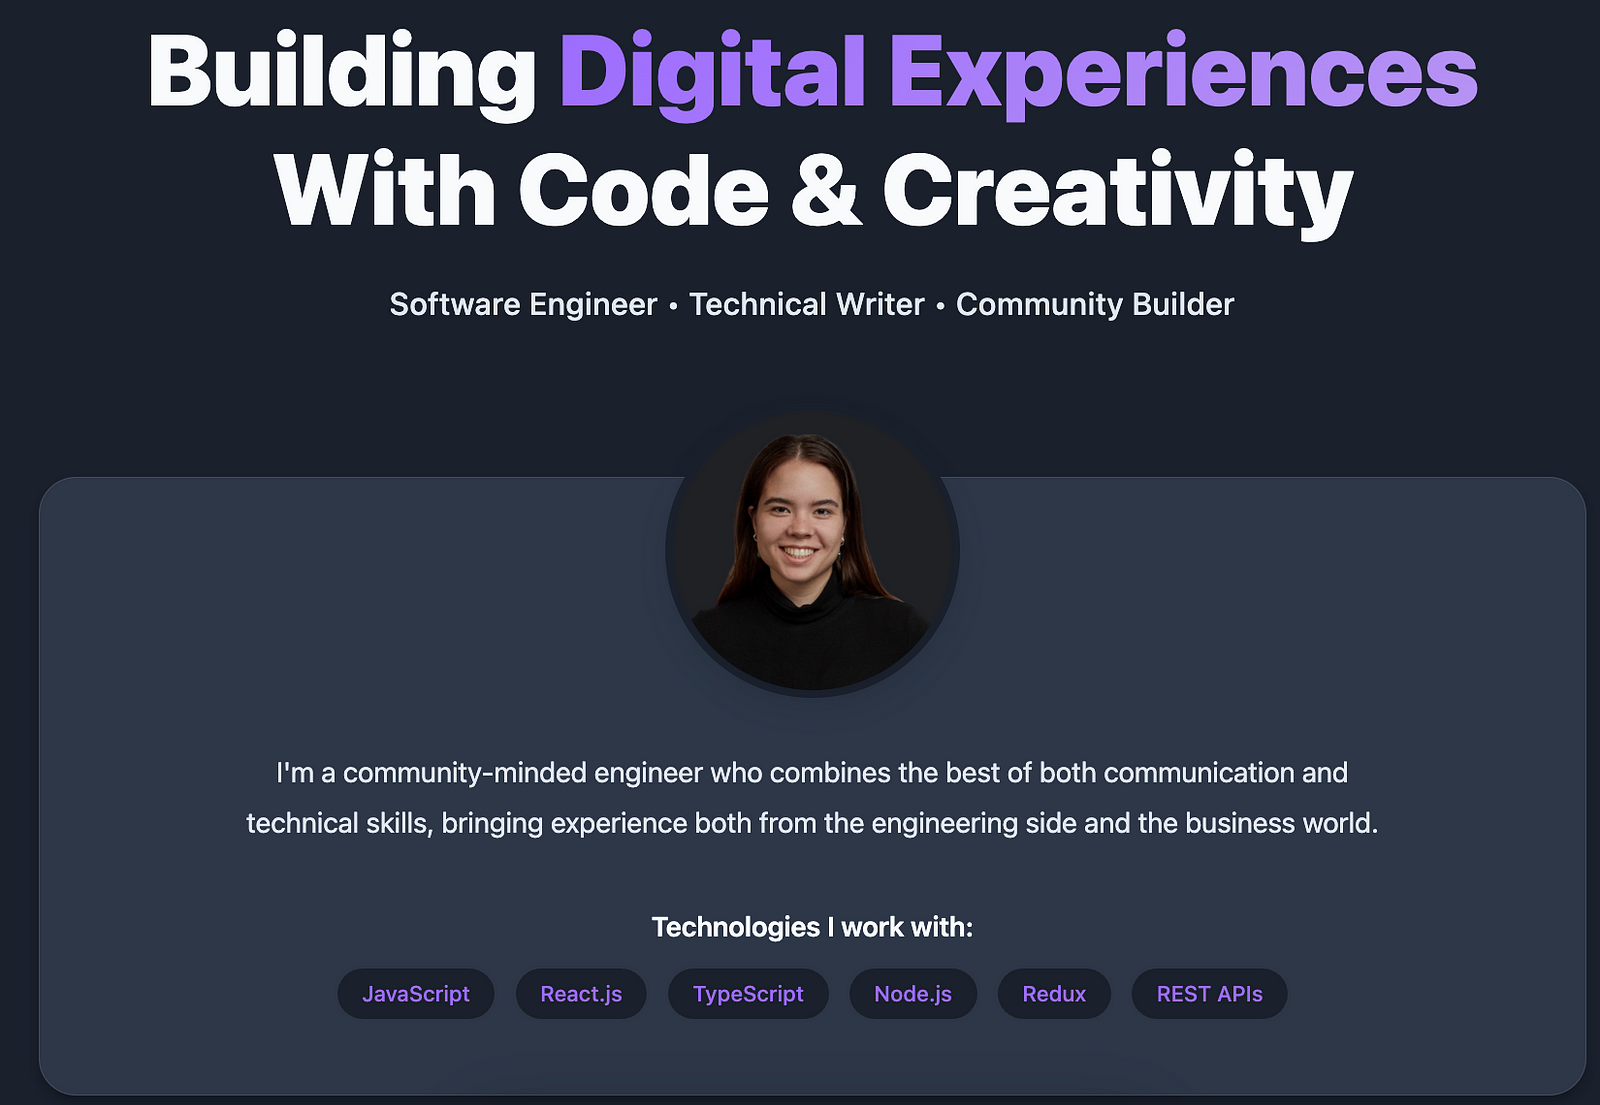
A snapshot of who I am and what I do 👆🏻
Skills Showcase: A clear display of my technical skills and areas of expertise.
Project Links: Direct links to my blog and podcast, allowing visitors to explore my work further.

Menu
Adding More Features
Once the home page was up and running, I knew I wanted to expand my portfolio.
Here’s what I added next:
Blog Integration
I integrated a blog section to share my thoughts, experiences, and insights on software engineering.
Using Gatsby’s powerful data layer, I can easily pull in my latest articles and keep the content fresh and engaging.
This was connected to my Hashnode account.
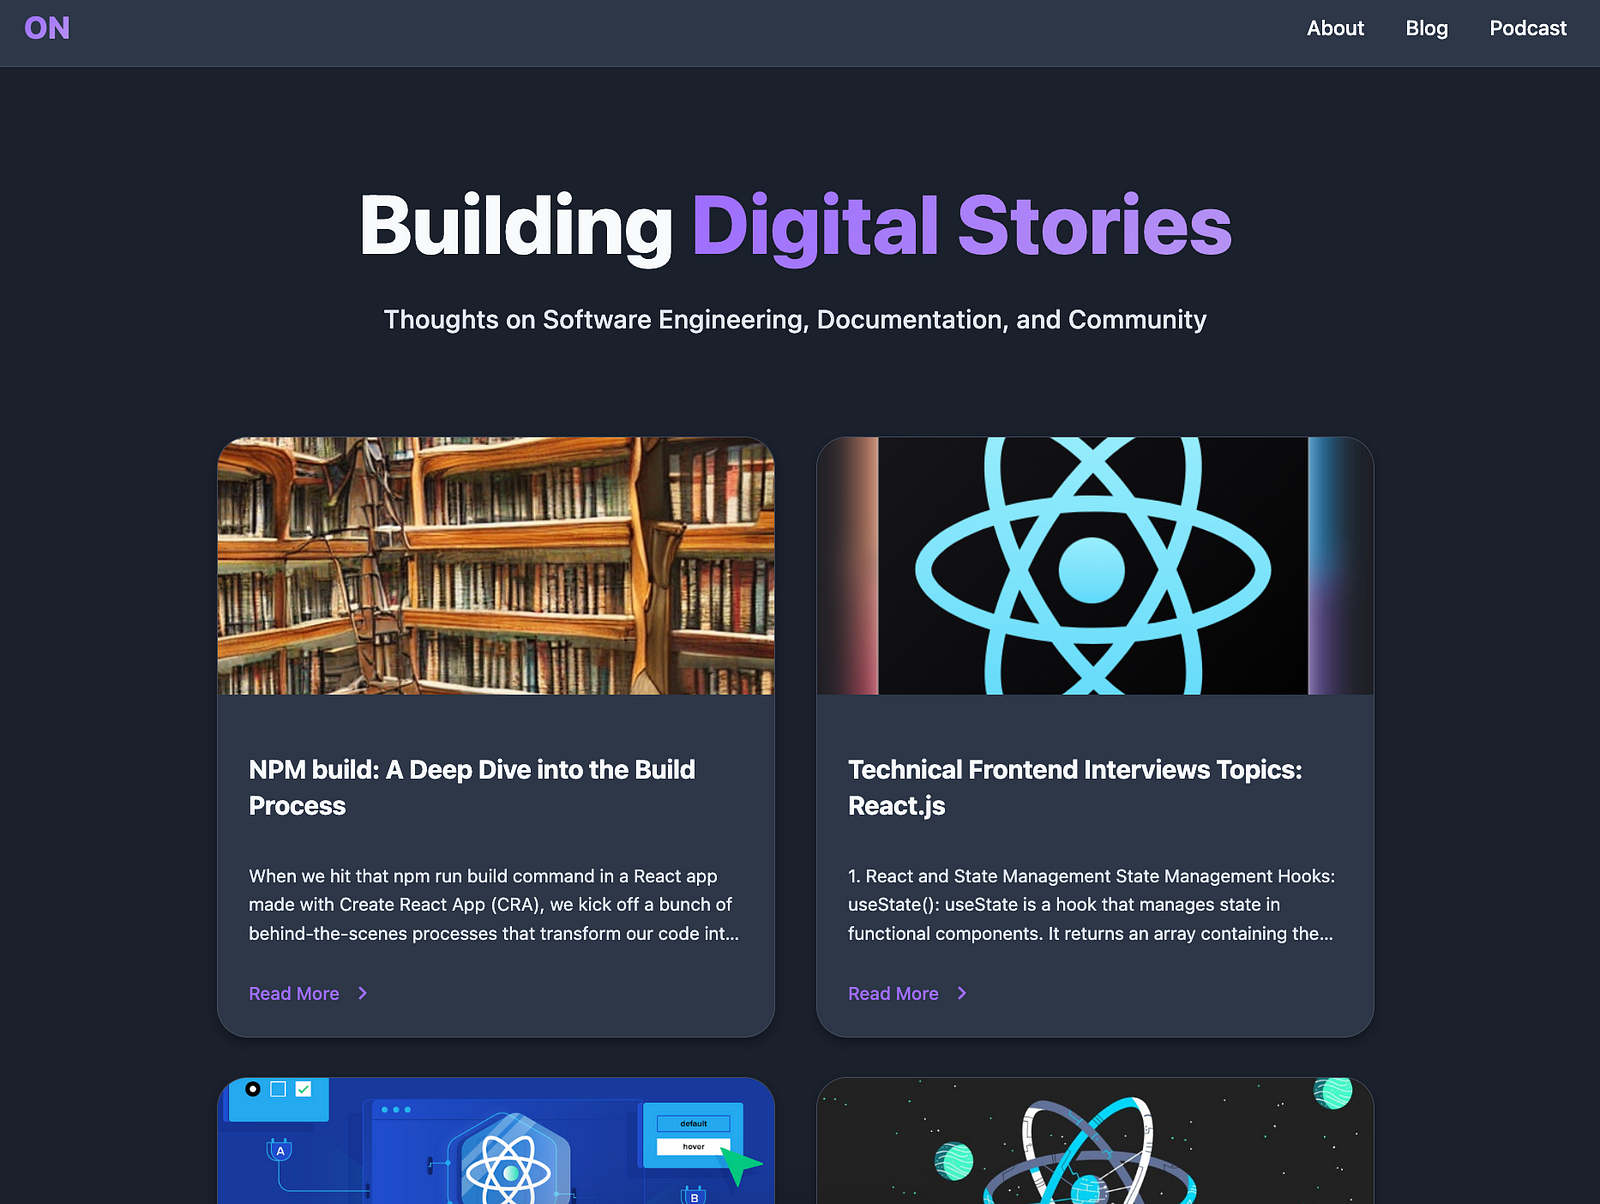
So it is fetching my articles from there and displaying them on my portfolio site. Here’s the component responsible for handling this function:
import axios from 'axios';

const fetchHashnodeBlogFeed = async (first = 10, after = null) => {
  const query = `
    query GetUserPosts($first: Int!, $after: String) {
      publication(host: "olgaconstantina.hashnode.dev") {
        posts(first: $first, after: $after) {
          edges {
            node {
              title
              brief
              coverImage {
                url
              }
              slug
            }
            cursor
          }
          pageInfo {
            hasNextPage
            endCursor
          }
        }
      }
    }
  `;

  const variables = { first, after };

  const headers = {
    'Content-Type': 'application/json',
    // 'Authorization': `Bearer YOUR_TOKEN_HERE`,
  };

  try {
    const response = await axios.post('https://gql.hashnode.com', { query, variables }, { headers });
    return response.data.data.publication.posts;
  } catch (error) {
    console.error('Error fetching Hashnode blog posts:', error.response?.data || error.message);
    throw error;
  }
};

export default fetchHashnodeBlogFeed;
Here's how it works:
- Import Axios: First, I import the axios library, which allows me to easily make HTTP requests.
2. Define the Function: I create an asynchronous function called fetchHashnodeBlogFeed. This function takes two parameters:
first: This specifies how many posts to fetch (default is 10).
after: This is used for pagination (default is null).
GraphQL Query: Inside the function, I define a GraphQL query as a string. This query requests specific fields for each blog post, such as the title, brief description, cover image URL, and slug.
Set Up Variables: I create a variables object to hold the values for the GraphQL query parameters.
5. Define Headers: I set up a headers object to specify the content type.
6. Make the Request: Using a try-catch block, I make a POST request to the Hashnode GraphQL endpoint with the query and variables. If the request is successful, I return the posts from the response. If there’s an error, I log the error message.
7. Export the Function: Finally, I export the function so it can be used in other parts of my application.
That’s all for now regarding fetching from Hashnode, check their API docs for more info: link
Podcast Page

The Podcast Page is a React component that displays information about a podcast, including its title, description, and a list of episodes.
Here’s a breakdown of its main parts:
Episodes Data: It defines an array of episodes, where each episode has properties like number, title, description, duration, date, thumbnail image, and a link to listen.
Rendering the Layout: The page uses a Layout component to wrap the content. Inside, it displays:
A hero section with the podcast title and description.
Links to listen on different platforms (Spotify, YouTube).
A section for the latest episodes, where each episode is displayed as a clickable card-
Dynamic Rendering: The episodes are rendered dynamically using the map function, which creates a card for each episode based on the data in the episodes array.
SEO Component: The Head component is used to set the page title for SEO purposes.
Code snippet:
import React from 'react';

const SimplePodcastPage = () => {
  const episodes = [
    {
      number: "Episode 1",
      title: "Introduction to Our Podcast",
      description: "In this episode...",
      duration: "20 mins",
      date: "Jan 1, 2024",
      link: "#"
    },
    {
      number: "Episode 2",
      title: "Understanding React",
      description: "How to get started...",
      duration: "25 mins",
      date: "Jan 8, 2024",
      link: "#"
    }
  ];

  return (
    <div>
      <h1>Our Podcast</h1>
      <p>Join us</p>
      <h2>Latest Episodes</h2>
      <div>
        {episodes.map((episode, index) => (
          <div key={index}>
            <h3>{episode.number}: {episode.title}</h3>
            <p>{episode.description}</p>
            <p>Duration: {episode.duration} | Date: {episode.date}</p>
            <a href={episode.link}>Listen Now</a>
          </div>
        ))}
      </div>
    </div>
  );
};

export default SimplePodcastPage;
Key Features of the Portfolio
With Gatsby as the backbone, I’ve implemented some exciting features:
Dark/Light Mode: Thanks to React Context, users can easily switch between themes, making the experience more personalized.
Responsive Design: My portfolio is mobile-first, ensuring it looks great on any device.
Dynamic Blog Integration: I’ve integrated my blog using Gatsby’s powerful data layer, allowing me to showcase my latest articles.
What’s Next?
I’m not done yet!
Here’s what I plan to tackle next:
Further Image Optimization: I want to ensure my images are as optimized as possible for performance.
Adding More Projects: I’m excited to showcase more of my work and share my journey with others.
Continuous Performance Improvements: I’ll keep refining my site to ensure it runs smoothly and efficiently.
Conclusion
The biggest takeaway from this experience?
Perfect code doesn't exist. What matters is the code you ship, the projects you finish, and the portfolio you create.